
Snipping Tool helps people have been seeking ways to capture a tiny area of their displays in order to save text, photographs, movies, and data that are hard to copy-paste. Despite the fact that you may utilize your computer’s screenshot capabilities, most of them come with limitations.
There is some good news, too, as developers have created snipping tools to assist you with screen-capturing Mac photos.
Continue reading to find out which snipping tool for Mac is the best in 2023.
Top 5 Best Mac Snipping Tools in 2023
1. Monosnap
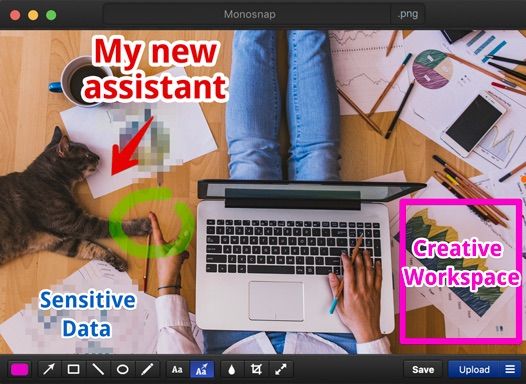
Software running on Mac OS, Chrome, and Windows are all compatible with Monosnap. For single users, the software is free; for non-commercial users, it costs $2.50; and for business users, it costs $5.
This is the finest part.Both a secure content management system and cloud storage are capabilities of Monosnap.It has great video editing tools, a free cloud storage platform, hotkeys that can be programmed, a tool for hiding personal information, and more.
2. Snagit
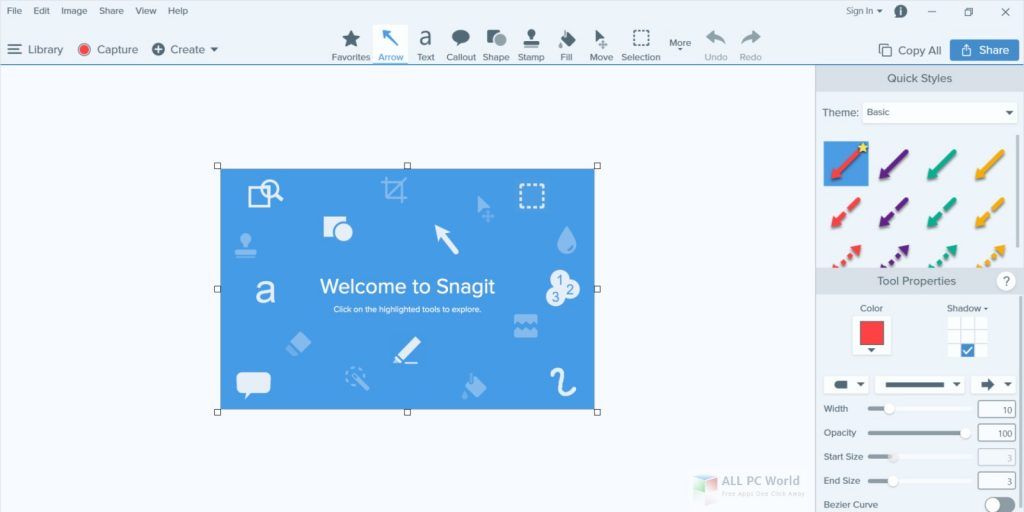
Snagit is one of the most popular Mac snipping tools in 2022. Also, you only pay $49.99 for this product once. Snagit is amazing at capturing audio, producing animated gifs, cutting video clips, screen recording, panoramic scrolling capture, and many more functions.
The programme is similarly simple to use, requiring only three steps.These involve screen capture, adding context, and distributing the finished result.
3. Lightshot
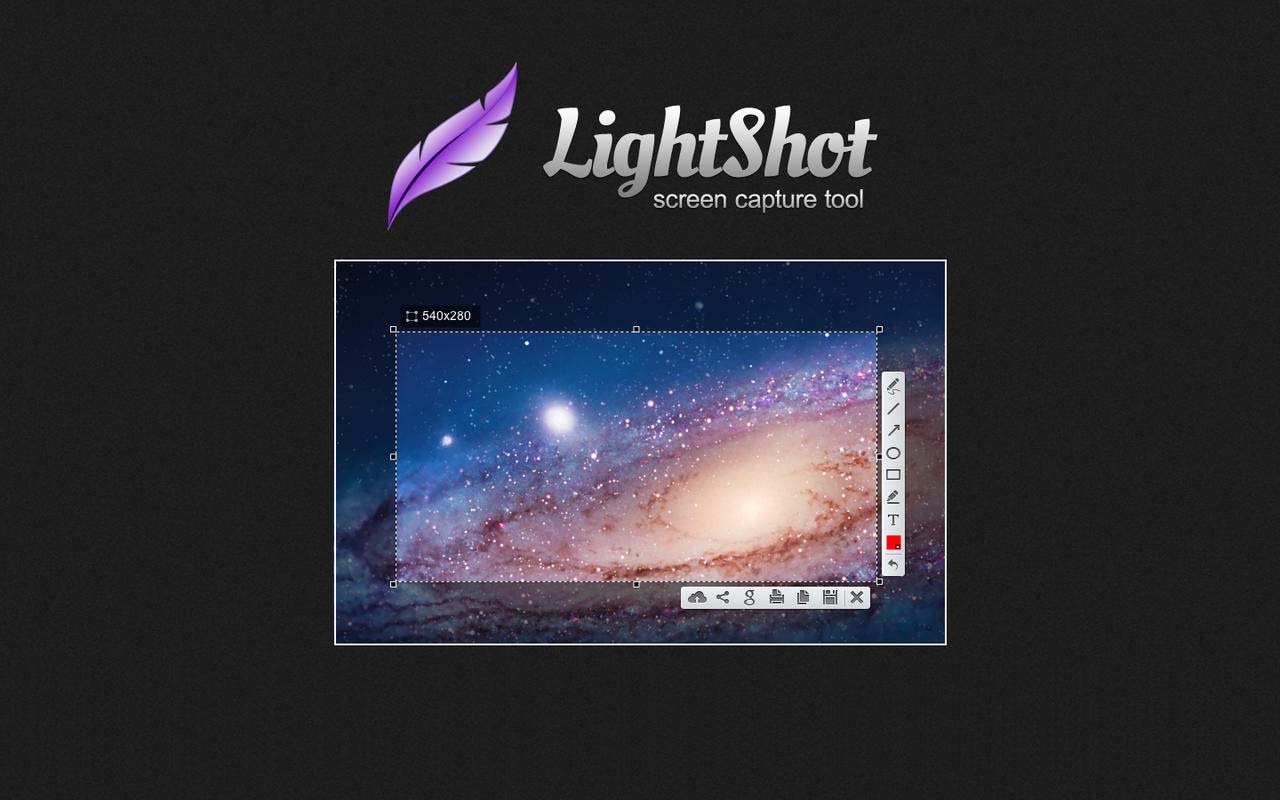
Lightshot is the best snipping tool in 2022 if you’re seeking the quickest way to snap a screenshot. The good news is that Lightshot offers more services than any other free snipping tool for Mac.
Its capabilities allow you to quickly capture any chosen section of your screen and search for comparable photographs. The programme also enables you to add text, shapes, and colour to your photographs.
4. TextSniper App
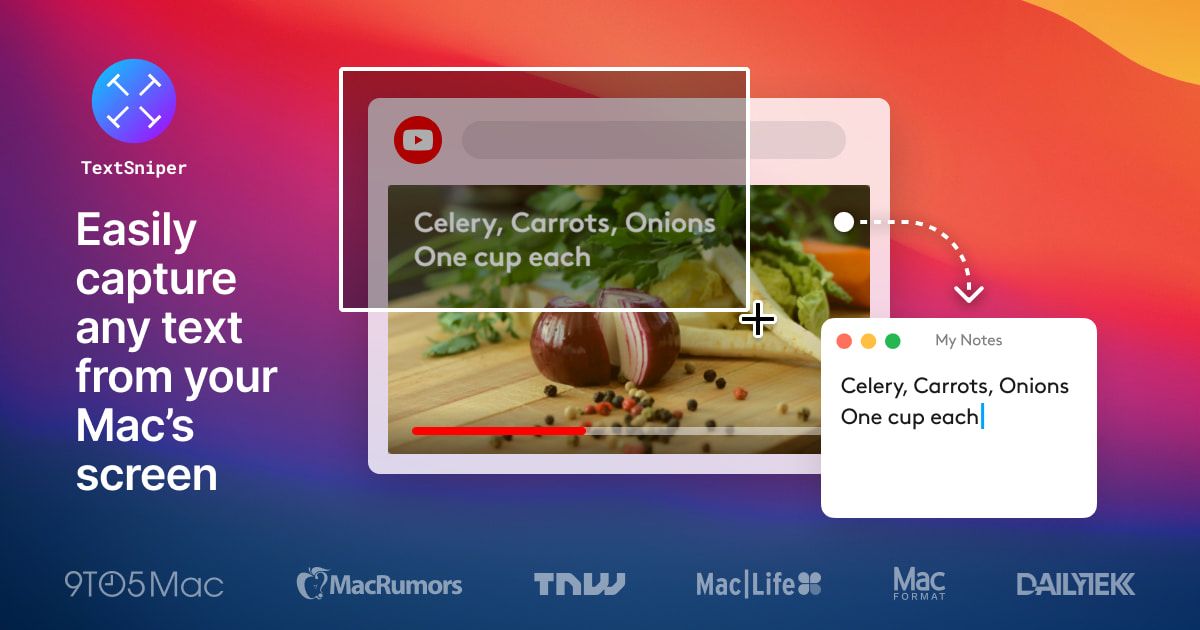
Textsniper for Mac is a snipping application for extracting text from PDF files, photos, and even movies. The software is simple to use, even for novices, because it includes instructions on its main page.
When it comes to cost, the tool is reasonably priced. The programme charges $6.99 to licence one macintosh operating system. Ideally, you can pay $retail price for three Mac operating systems.
5. SnapNDrag
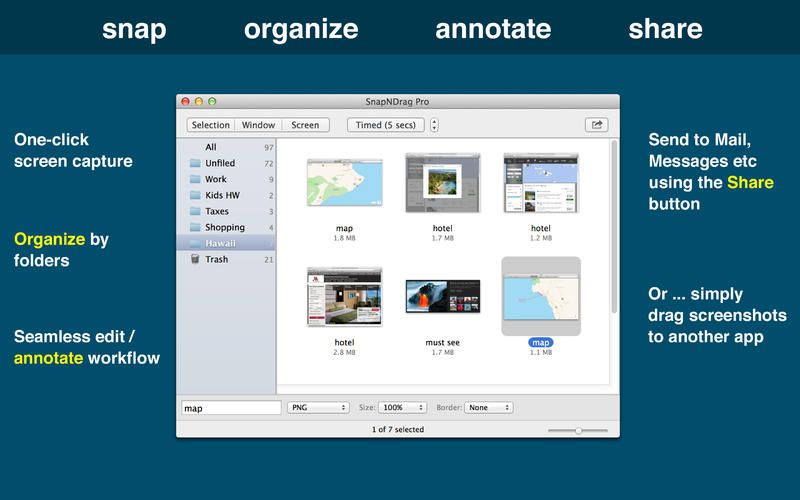
SnapNDrag is a snipping tool that is absurdly simple to use and is available in both free and premium editions. Features like deleting, renaming, and searching are included in the free version.
The $10 premium version, on the other hand, has all the same features as the free version plus the ability to resize photos, turn off ads, set global hotkeys, and more. The tool also integrates effectively with other services like email, Facebook, and Twitter.
How to Snip on a Mac
You only need basic snapshot capabilities to snip on Mac.There are different ways to capture the screen on a Mac. For example, you can use a screen shortcut to capture an area, a window, or the whole screen. Continue reading to learn the basics of snipping on a Mac.
1. Command + Shift + 5
The feature is the most recent method for taking screenshots of your Apple screen.When you use this approach, an overlay window opens out to let you pick a full-screen, a window, or a selection snapshot. You may use this function to capture movies of the full screen or a specific area of it.It also gives you access to two additional alternatives.Choose where to store the file and set a timer for 5–10 seconds to verify your file is flawless.
On your Mac, taking screenshots should be simple and enjoyable.Also, you do not need to learn shortcuts because the tools mentioned above were designed to make snipping simple. To help you navigate the tools, they also provide lessons on their user interfaces.All that is left is for you to choose the app that suits your needs.
2. Command + Shift + 4
To capture your material in a seamless manner, use CMD+SHIFT+4. You may use this approach to choose the part that has to be recorded. You can also choose only what is required and ignore the rest. The procedure is straightforward.
- Press CMD + SHIFT + 4 at the same time until a little bull’s eye appears on the screen.
- Using your mouse or touchpad, click the top-left corner of the area you want to screenshot.
- Hold and drag the cursor to choose the full area to be screenshotted.
- To take the picture, let go of the mouse.
Then, in the lower right-hand corner of the screen, a little snapshot preview appears.Sadly, the image vanishes after a few seconds, so you may need to make your changes quickly.Notably, if you make a mistake when editing, you can cancel the box to replicate the first taken image on your screen.
3. Command + Shift + 2
This is one of the quickest methods to take a screenshot on your Mac.When you need to temporarily hold onto anything, this method comes in handy.When you press Command, Shift, and “3” at the same time, the section you copied goes straight to your desktop.
The keys work similarly to those on Windows.Upon the capture of the snapshot, a thumbnail preview shows on the lower right side of your screen.Click the image to see the entire Mac snipping tool. You can now add notes, change things, and rotate tasks before saving them to the desktop.