
One of the simplest methods to improve the appearance of your house is to re-paint your walls and ceiling… can entirely wreck it if you don’t know what you’re doing. Cheap brushes, hurriedly purchased paint, and improperly applied painting techniques may all transform an exciting DIY project into nightmare stuff. But you don’t have to go that route. Make some coffee Professional Interior Painting and read the guidelines below to learn how to paint your home’s inside like a pro.
Steps for a Professional for Interior Painting
Step 1 – Color Selection

Before we begin, you must select your colour. If you want to match an existing hue on your wall, you may use an old can of paint as a guide or take a chip to a paint store. With our visualizer tools, we can help you determine the Professional Interior Painting colour, finish, and kind of paint, and we also provide a Color Consulting Service if you need assistance making a Interior painting for beginners selection.
Step 2 – Protect the Area

We use a fresh, clean piece of protective plastic sheeting to cover the Professional Interior Painting furniture and flooring. We also use drop cloths to cover your flooring, making sure that every inch of the space is Professional painting services protected.
Step 3 – Prepare Surfaces
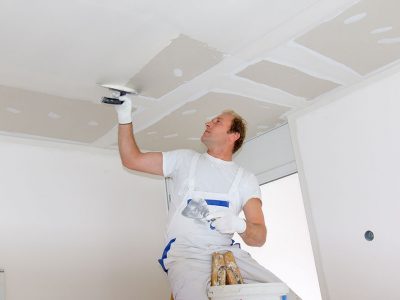
Our painting staff prepares the walls for interior painting by repairing Professional Interior Painting any holes or cracks in the ceilings and walls, sealing any stains, and scuff sanding any uneven surfaces, including old or loose paint. This results in a smooth, clean canvas, which is require for a great Interior painting ideas finish.
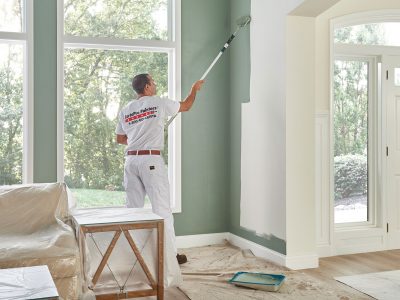
Step 4 – Apply New Paint
After priming any areas corrected in the previous stage, we apply high grade paints for a consistent finish. There are several finish options available, including flat, matte, eggshell, satin, semi-gloss, and Professional Interior Painting high-gloss, and we will go through the benefits of each with you ahead of time so you can make an informed selection. The time required will vary according to the magnitude of the project, but we will always work as swiftly and effectively as Professional painting tips and tricks possible.
Step 5 – Clean Up
The paint will dry in a few hours, and you do not need to leave the house during this time. All of the painting supplies and covers are remove by the team. We sweep your floors and carpets and return Professional Interior Painting everything to its original location, all while paying close attention to thoroughly cleaning the work Interior painting supplies area.
Step 6 – Walk Through Inspection

Following our inspection, your Job Site Supervisor will accompany you around the area, allowing you to examine our work and offer any initial feedback. You may also be cal for a follow-up satisfaction Professional Interior Painting survey to see how well we met your expectations. Our paint treatments are meant to last up to 7 years on a well keep surface, so you can enjoy your newly paint space for many years to What to expect from professional painters come.
Tips for a Flawless Finish
Interior home painting is not intuitive, despite appearances. Most of us are familiar with the method of putting paint on a flat surface, which we learned in kindergarten with finger painting. A genuinely competent interior paint job, on the other hand, is a very different storey. Use these techniques on your next interior painting project to make it go faster and smoother, with a cleaner, more appealing appearance.
:max_bytes(150000):strip_icc():format(webp)/rules-for-better-interior-painting-1822836_hero-550dd261a08d467b9dd2778356397d5f-4843bc21c1e84ea887dd010b07c6921e.jpeg)
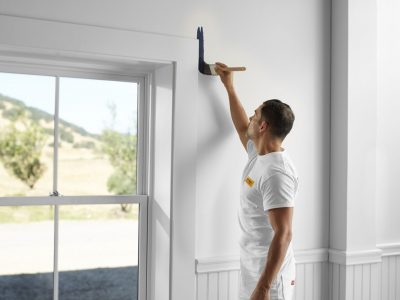
Use a Tack Cloth to Clean the Surface
A tack cloth is a low-cost painting product that helps you clean the surface before painting or staining for perfect results. A beeswax-impregnated cheesecloth or tack cloth gently removes sawdust, wood shavings, and other dirt from your surface. You avoid putting a damp cloth to the surface by using a tack cloth. If you don’t have a tack cloth, a damp cloth can suffice, but be sure to squeeze it out fully first. Avoid using a tack cloth on big surfaces. It is best suite for trim, doors, and cabinets than than walls and ceilings. Also, avoid pressing too hard on the tack cloth because this might spread beeswax on the surface, which can be difficult to Professional Interior Painting remove.
Purchase High-Quality Paint
What is the difference between one paint offered for a price and another, seemingly equivalent paint advertised for five times the price? Often, the dirt-cheapest paints are builder’s grade paints with less solids than higher-quality paints. Solids are what contribute to a nice paint build. Builder’s grade paints like Sherwin-Williams ProMar 400 Interior Latex and Valspar Professional Interior Latex have a role in rapid, low-cost, low-commitment paint jobs. However, if you want a paint that will last, invest in a higher-quality paint.
:max_bytes(150000):strip_icc():format(webp)/rules-for-better-interior-painting-1822836_rollers-1e93972655fe4eb1b4dae5d4e68c06c5.jpg)
Purchase High-Quality Roller Covers and Brushes
Roller coverings of poor quality put fuzz and lint on the walls. When fluff and lint become lodged in the paint and the paint dries, the result is rough walls that are difficult to restore. Brushes of poor quality cause streaky brush marks; instead, invest in high-quality brushes and be cautious about keeping your costly investment. Some do-it-yourself painters make the error of buying cheap chip brushes. Interior painting should not be done using chip brushes. Rather, they are intended for the application of glues, adhesives, and solvents. It is worthwhile to spend more money on superior roller coverings and brushes. In the end, your surface will be smoother.
Use Masking Film to Cover Clean Areas
Masking film is one of those hidden techniques that experienced painters use all the time but that many do-it-yourself painters are unaware of. Masking film is a thin plastic sheet that comes in rolls or in squares that have been folded up. Its thinness is critical to its success. Masking film, unlike thicker plastic sheeting commonly used to cover furniture, grips onto flat surfaces and adheres to them on its own. There is no need to tape the film down unless it is next to the edge of a painted surface. Masking film is held in place by static electricity.
Maintain a Wet Edge to Avoid Overlap Marks
Always preserve a moist edge when painting and work away from it. The more glossy the paint, the more likely it is to reveal overlap markings. Semi-gloss and glossy paints, in particular, need careful attention to keeping a moist edge. However, there is almost little risk of developing overlap marks when using flat or matte paint.